Irresistible Chicken Tenders: Master the Art of Crispy, Juicy Perfection!
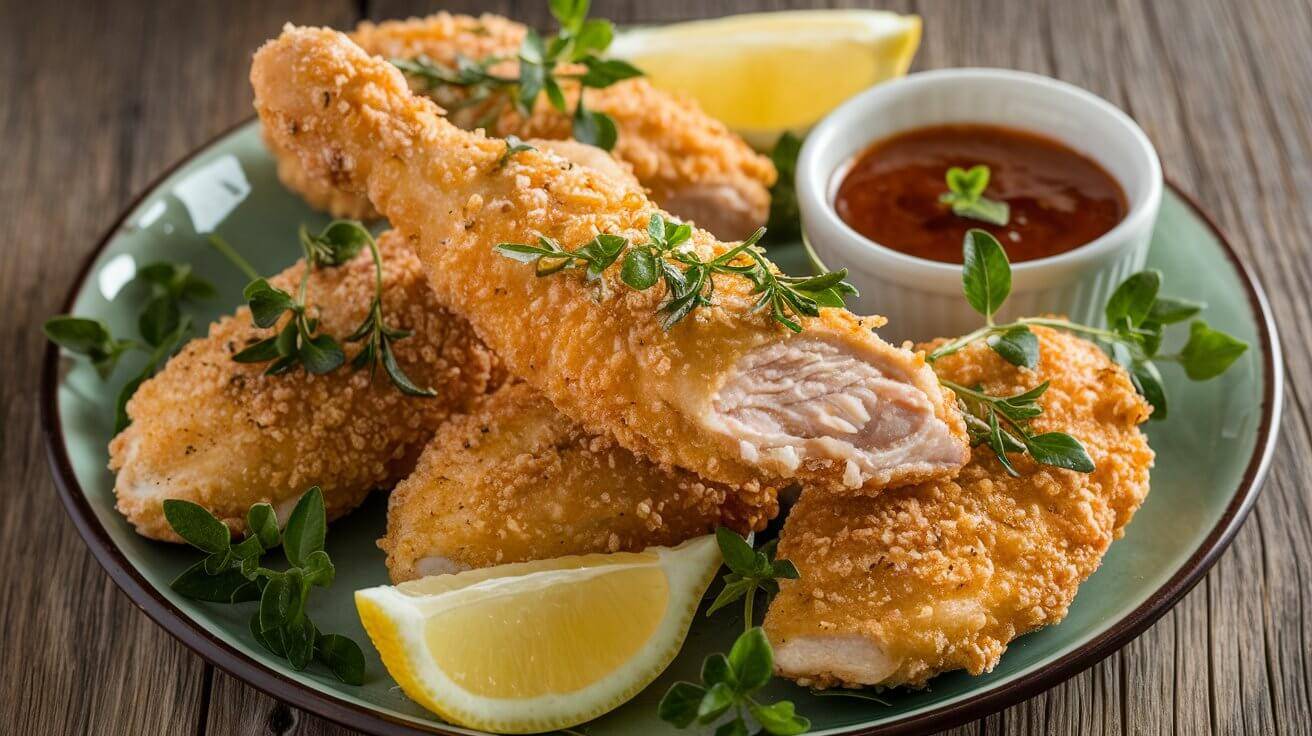
Chicken tenders, those golden strips of succulent poultry, have captured the hearts (and taste buds) of food lovers around the world. Whether you’re a busy parent looking for a quick meal solution, a culinary enthusiast seeking to perfect your chicken game, or someone who simply can’t resist the allure of a crispy, juicy piece of chicken, this comprehensive guide is for you. We’ll dive deep into the world of chicken tenders, exploring their history, sharing foolproof recipes, and providing expert tips to ensure your tenders are nothing short of spectacular.
Table of Contents
- The Tasty History of Chicken Tenders
- Understanding Chicken Tenders: Cuts and Quality
- Essential Ingredients for Perfect Chicken Tenders
- Classic Crispy Chicken Tenders Recipe
- Cooking Methods: From Frying to Air Frying
- Flavor Variations to Spice Up Your Tenders
- Homemade Dipping Sauces to Elevate Your Tenders
- Healthier Alternatives: Baked and Grilled Tenders
- Meal Prep and Storage Tips
- Pairing and Serving Suggestions
- Nutritional Information and Dietary Considerations
- Troubleshooting Common Chicken Tender Issues
- Frequently Asked Questions
- Conclusion: Mastering the Art of Chicken Tenders
1. The Tasty History of Chicken Tenders
Chicken tenders, also known as chicken fingers or chicken strips, have a relatively recent history compared to many other popular dishes. Their rise to fame is closely tied to the growth of the fast-food industry and changing American eating habits in the latter half of the 20th century.
Origins and Evolution
The concept of breaded and fried chicken has been around for centuries, with dishes like schnitzel in Austria and katsu in Japan. However, chicken tenders as we know them today are believed to have originated in the United States in the 1970s.
The exact origin is debated, but many credit the Puritan Backroom restaurant in Manchester, New Hampshire, with inventing chicken tenders in 1974. The story goes that the owner’s son was experimenting in the kitchen and decided to fry strips of chicken breast, creating what would become a culinary sensation.
Rise to Popularity
Chicken tenders quickly gained popularity for several reasons:
- Convenience: They were easy to eat with hands, making them perfect for on-the-go meals.
- Kid-Friendly: The simple flavor and texture appealed to children, making them a go-to option for family meals.
- Versatility: Tenders could be easily flavored and paired with various dipping sauces.
- Cost-Effective: Using chicken breast meat was an economical way for restaurants to serve chicken.
By the 1980s, chicken tenders had become a staple on children’s menus across the United States. Fast-food chains quickly adopted them, further cementing their place in American cuisine.
Global Spread
As American fast-food chains expanded globally, so did the popularity of chicken tenders. Today, you can find variations of this dish around the world, from Japanese karaage to Indian chicken pakora.
Modern Trends
In recent years, there’s been a trend towards upgrading chicken tenders. Gourmet versions featuring high-quality, organic chicken and artisanal breading have appeared on upscale restaurant menus. Additionally, the rise of health-conscious eating has led to the development of baked and air-fried versions of this classic dish.
2. Understanding Chicken Tenders: Cuts and Quality
To create the perfect chicken tenders, it’s essential to start with the right cut of meat and understand what makes for high-quality chicken.
What Are Chicken Tenders?
Chicken tenders, also known as chicken tenderloins, are a specific cut of meat from the chicken breast. They are the strip of muscle that runs along the underside of the breast, loosely connected to the larger piece of breast meat.
Key characteristics of chicken tenders:
- Smaller and more tender than the main part of the chicken breast
- Have a slightly different texture, often described as more “velvety”
- Typically about 1.5 to 2 inches wide and 4 to 8 inches long
Chicken Tenders vs. Chicken Strips
While often used interchangeably, there is a distinction:
- Chicken Tenders: Made specifically from the tenderloin cut
- Chicken Strips: Can be made from any part of the chicken breast cut into strips
Choosing Quality Chicken
For the best chicken tenders, look for:
- Fresh chicken: If possible, choose fresh over frozen for better texture.
- Color: Look for pink meat with no gray or transparent areas.
- Texture: The meat should be firm to the touch, not slimy or sticky.
- Smell: Fresh chicken should have little to no odor.
- Source: Consider organic or free-range options for potentially better flavor and ethical considerations.
Preparing Chicken Tenders
When preparing chicken tenders:
- Remove the tendon: There’s often a tough white tendon running through the tenderloin. You can remove it with a knife or special kitchen tool.
- Even sizing: If using chicken breast cut into strips, ensure they are evenly sized for consistent cooking.
- Pat dry: Remove excess moisture before breading or seasoning for better texture.
3. Essential Ingredients for Perfect Chicken Tenders
Creating delicious chicken tenders relies on using the right ingredients. Here’s what you’ll need for classic crispy chicken tenders:
The Chicken
- 1 pound chicken tenderloins or chicken breast cut into 1-inch strips
The Breading Station
- Flour Mixture:
- 1 cup all-purpose flour
- 1 teaspoon salt
- 1/2 teaspoon black pepper
- 1/2 teaspoon garlic powder
- 1/2 teaspoon paprika
- Egg Wash:
- 2 large eggs
- 2 tablespoons milk
- Breading:
- 1 1/2 cups panko breadcrumbs
- 1/2 cup grated Parmesan cheese (optional)
- 1 teaspoon dried herbs (such as thyme, oregano, or Italian seasoning)
For Frying
- Vegetable oil or canola oil for deep frying
Optional Ingredients for Variations
- Buttermilk (for marinating)
- Hot sauce (for added kick)
- Different spices (cayenne, onion powder, smoked paprika)
- Crushed cornflakes or potato chips (for extra crunch)
4. Classic Crispy Chicken Tenders Recipe
Now that we understand the history, cuts, and ingredients, let’s dive into a foolproof recipe for classic crispy chicken tenders.
Ingredients
(Use the ingredients listed in the previous section)
Instructions
- Prepare the Chicken:
- If using whole chicken breasts, cut them into 1-inch wide strips.
- Remove any visible fat or tendons.
- Pat the chicken dry with paper towels.
- Set Up the Breading Station:
- In one shallow dish, mix the flour, salt, pepper, garlic powder, and paprika.
- In a second dish, whisk together the eggs and milk.
- In a third dish, combine the panko breadcrumbs, Parmesan cheese (if using), and dried herbs.
- Bread the Chicken:
- Dip each chicken tender in the flour mixture, shaking off excess.
- Then dip in the egg wash, allowing excess to drip off.
- Finally, coat thoroughly in the breadcrumb mixture, pressing gently to adhere.
- Place breaded tenders on a clean plate or baking sheet.
- Prepare for Frying:
- In a large, heavy-bottomed pot or deep fryer, heat 2-3 inches of oil to 350°F (175°C).
- Line a baking sheet with paper towels for draining.
- Fry the Chicken Tenders:
- Carefully lower 3-4 tenders into the hot oil.
- Fry for 3-4 minutes, until golden brown and cooked through (internal temperature should reach 165°F or 74°C).
- Remove with a slotted spoon and place on the prepared baking sheet.
- Repeat with remaining tenders.
- Serve:
- Allow to cool slightly before serving.
- Serve with your favorite dipping sauces.
Tips for Success
- Don’t overcrowd the pot when frying; this can lower the oil temperature and result in greasy tenders.
- If not serving immediately, keep the fried tenders warm in a 200°F (95°C) oven.
- For extra flavor, marinate the chicken in buttermilk for 2-4 hours before breading.
5. Cooking Methods: From Frying to Air Frying
While deep-frying is the traditional method for cooking chicken tenders, there are several other techniques you can use to achieve crispy, delicious results. Let’s explore various cooking methods:
1. Deep Frying
Pros:
- Creates a perfectly crispy exterior
- Yields juicy, tender meat
- Quick cooking time
Cons:
- Requires a lot of oil
- Can be messy
- Less healthy than other methods
Tips:
- Maintain oil temperature between 350-375°F (175-190°C)
- Use a thermometer to ensure proper oil temperature
- Don’t overcrowd the pot
2. Pan Frying
Pros:
- Requires less oil than deep frying
- Can be done in a standard skillet
- Allows for easy monitoring of doneness
Cons:
- May not cook as evenly as deep frying
- Requires flipping halfway through cooking
Tips:
- Use a heavy-bottomed skillet for even heat distribution
- Add about 1/4 inch of oil to the pan
- Cook for about 3-4 minutes per side
3. Oven Baking
Pros:
- Healthier option with less oil
- Can cook large batches at once
- Less hands-on time required
Cons:
- May not achieve the same level of crispiness as frying
- Longer cooking time
Tips:
- Preheat oven to 425°F (220°C)
- Place tenders on a wire rack over a baking sheet for better air circulation
- Spray tenders with cooking oil for extra crispiness
- Bake for 15-20 minutes, flipping halfway through
4. Air Frying
Pros:
- Uses very little oil
- Produces crispy exterior similar to deep frying
- Quick cooking time
Cons:
- Limited capacity depending on air fryer size
- May require batches for larger quantities
Tips:
- Preheat air fryer to 400°F (200°C)
- Spray tenders with oil before cooking
- Cook for 7-10 minutes, flipping halfway through
- Don’t overcrowd the basket
5. Grilling
Pros:
- Adds smoky flavor
- Great for summer cooking
- No added oil necessary
Cons:
- Requires careful monitoring to prevent burning
- May dry out if overcooked
Tips:
- Preheat grill to medium-high heat
- Oil the grates to prevent sticking
- Grill for 3-4 minutes per side
- Use a meat thermometer to ensure doneness
Each method has its own advantages and can produce delicious results. Choose the one that best fits your dietary preferences, available equipment, and desired outcome.
6. Flavor Variations to Spice Up Your Tenders
While classic chicken tenders are delicious on their own, experimenting with different flavors can take your tenders to the next level. Here are some exciting variations to try:
1. Spicy Buffalo Tenders
- Add 1 tablespoon of cayenne pepper to the flour mixture
- After frying, toss in buffalo sauce (1/2 cup hot sauce mixed with 1/4 cup melted butter)
- Serve with blue cheese dressing and celery sticks
2. Parmesan Herb Tenders
- Mix 1/2 cup grated Parmesan and 1 tablespoon each of dried basil and oregano into the breadcrumb mixture
- Serve with marinara sauce for dipping
3. Coconut Curry Tenders
- Replace half the breadcrumbs with shredded coconut
- Add 1 tablespoon curry powder to the flour mixture
- Serve with mango chutney or sweet chili sauce
4. Honey Mustard Glazed Tenders
- Mix 1/4 cup honey with 2 tablespoons Dijon mustard
- Brush onto tenders during the last few minutes of cooking
- Sprinkle with chopped fresh herbs before serving
5. Lemon Pepper Tenders
- Add zest of 1 lemon and 1 tablespoon coarsely ground black pepper to the breadcrumb mixture
- Serve with lemon wedges and a garlic aioli
6. BBQ Bacon Tenders
- Wrap each tender with a slice of bacon before breading
- After cooking, brush with your favorite BBQ sauce
- Serve with extra BBQ sauce for dipping
7. Asian-Inspired Sesame Tenders
- Add 2 tablespoons sesame seeds to the breadcrumb mixture
- Mix 1/4 cup soy sauce, 2 tablespoons honey, and 1 teaspoon sesame oil for a dipping sauce
8. Mexican-Style Tenders
- Add 1 tablespoon each of chili powder and ground cumin to the flour mixture
- Serve with salsa and guacamole for dipping
Remember, these are just starting points. Feel free to get creative and invent your own flavor combinations based on your favorite cuisines or ingredients!
7. Homemade Dipping Sauces to Elevate Your Tenders
No chicken tender experience is complete without a selection of delicious dipping sauces. Here are some easy homemade sauce recipes to complement your tenders:
1. Classic Honey Mustard
Ingredients:
- 1/4 cup Dijon mustard
- 1/4 cup honey
- 2 tablespoons mayonnaise
- 1 tablespoon white vinegar
Instructions:
Whisk all ingredients together until smooth. Refrigerate until ready to use.
2. Spicy Sriracha Mayo
Ingredients:
- 1/2 cup mayonnaise
- 2-3 tablespoons Sriracha sauce (adjust to taste)
- 1 tablespoon lime juice
- 1/2 teaspoon garlic powder
Instructions:
Mix all ingredients in a bowl. Adjust Sriracha to desired heat level.
3. Tangy BBQ Sauce
Ingredients:
- 1 cup ketchup
- 1/4 cup brown sugar
- 2 tablespoons apple cider vinegar
- 1 tablespoon Worcestershire sauce
- 1 teaspoon smoked paprika
- 1/2 teaspoon garlic powder
- Salt and pepper to taste
Instructions:
Combine all ingredients in a saucepan. Simmer over low heat for 15-20 minutes, stirring occasionally.
4. Garlic Parmesan Sauce
Ingredients:
- 1/2 cup mayonnaise
- 1/4 cup grated Parmesan cheese
- 2 cloves garlic, minced
- 1 tablespoon lemon juice
- 1/4 teaspoon dried oregano
- Salt and pepper to taste
Instructions:
Mix all ingredients in a bowl. Let sit for at least 30 minutes before serving to allow flavors to meld.
5. Ranch Dressing
Ingredients:
- 1/2 cup buttermilk
- 1/2 cup mayonnaise
- 1 teaspoon dried dill
- 1/2 teaspoon garlic powder
- 1/2 teaspoon onion powder
- 1/4 teaspoon salt
- 1/4 teaspoon black pepper
Instructions:
Whisk all ingredients together in a bowl. Refrigerate for at least 1 hour before serving.
6. Sweet and Sour Sauce
Ingredients:
- 1/3 cup pineapple juice
- 1/4 cup rice vinegar
- 1/4 cup ketchup
- 3 tablespoons brown sugar
- 1 tablespoon soy sauce
- 1 tablespoon cornstarch mixed with 1 tablespoon water
Instructions:
Combine all ingredients except cornstarch mixture in a small saucepan. Bring to a simmer, then stir in cornstarch mixture. Cook until thickened, about 1-2 minutes.
7. Avocado Cilantro Lime Dip
Ingredients:
- 1 ripe avocado
- 1/4 cup Greek yogurt
- 2 tablespoons fresh cilantro, chopped
- 2 tablespoons lime juice
- 1 clove garlic, minced
- Salt to taste
Instructions:
Blend all ingredients in a food processor until smooth. Adjust seasoning to taste.
These homemade sauces will take your chicken tenders to the next level, offering a range of flavors to suit any palate. Experiment with different combinations to find your favorite!
8. Healthier Alternatives: Baked and Grilled Tenders
For those looking to enjoy chicken tenders with a healthier twist, here are some alternatives to traditional deep-frying:
Oven-Baked Chicken Tenders
Ingredients:
- 1 pound chicken tenderloins
- 1 cup whole wheat breadcrumbs
- 1/4 cup grated Parmesan cheese
- 1 teaspoon paprika
- 1 teaspoon garlic powder
- 1/2 teaspoon salt
- 1/4 teaspoon black pepper
- 2 eggs, beaten
- Cooking spray
Instructions:
- Preheat oven to 425°F (220°C). Line a baking sheet with parchment paper.
- Mix breadcrumbs, Parmesan, and seasonings in a shallow dish.
- Dip each tender in beaten egg, then coat with breadcrumb mixture.
- Place on prepared baking sheet and spray lightly with cooking spray.
- Bake for 15-20 minutes, flipping halfway through, until golden and cooked through.
Grilled Herb Chicken Tenders
Ingredients:
- 1 pound chicken tenderloins
- 2 tablespoons olive oil
- 2 tablespoons lemon juice
- 2 cloves garlic, minced
- 1 teaspoon dried oregano
- 1 teaspoon dried basil
- 1/2 teaspoon salt
- 1/4 teaspoon black pepper
Instructions:
- In a bowl, mix olive oil, lemon juice, garlic, and herbs.
- Add chicken tenders and marinate for 30 minutes to 2 hours.
- Preheat grill to medium-high heat.
- Grill tenders for 3-4 minutes per side, until cooked through.
Air Fryer Chicken Tenders
Ingredients:
- 1 pound chicken tenderloins
- 1 cup panko breadcrumbs
- 1/4 cup grated Parmesan cheese
- 1 teaspoon paprika
- 1 teaspoon garlic powder
- 1/2 teaspoon salt
- 1/4 teaspoon black pepper
- 2 eggs, beaten
- Cooking spray
Instructions:
- Preheat air fryer to 400°F (200°C).
- Mix breadcrumbs, Parmesan, and seasonings in a shallow dish.
- Dip each tender in beaten egg, then coat with breadcrumb mixture.
- Place tenders in air fryer basket, spray with cooking spray.
- Cook for 7-10 minutes, flipping halfway through, until golden and cooked through.
These healthier alternatives reduce the amount of oil used while still delivering delicious, crispy chicken tenders.
9. Meal Prep and Storage Tips
Chicken tenders are great for meal prep. Here are some tips for preparing and storing them:
Meal Prep Ideas:
- Make a large batch and use throughout the week in salads, wraps, or as a quick protein option.
- Prepare uncooked breaded tenders and freeze for later use.
- Cook tenders and pair with different sides for varied meals throughout the week.
Storage Guidelines:
- Refrigeration: Cooked chicken tenders can be stored in an airtight container in the refrigerator for 3-4 days.
- Freezing (Raw):
- Bread the tenders as per recipe.
- Place on a baking sheet and freeze until solid (about 2 hours).
- Transfer to a freezer bag and store for up to 3 months.
- Cook from frozen, adding 5-7 minutes to the cooking time.
- Freezing (Cooked):
- Allow cooked tenders to cool completely.
- Place in a freezer bag, removing as much air as possible.
- Freeze for up to 2 months.
- Reheat in a 375°F (190°C) oven until warmed through.
Reheating Tips:
- Oven: Reheat at 375°F (190°C) for 10-15 minutes until crispy and heated through.
- Air Fryer: Reheat at 375°F (190°C) for 3-5 minutes.
- Microwave: While not ideal for maintaining crispiness, it’s quick. Heat in 30-second intervals until warm.
10. Pairing and Serving Suggestions
Chicken tenders are versatile and can be paired with a variety of sides and incorporated into different meals. Here are some ideas:
Classic Pairings:
- French Fries or Sweet Potato Fries
- Coleslaw
- Macaroni and Cheese
- Green Salad
- Corn on the Cob
Healthier Side Options:
- Roasted Vegetables (broccoli, cauliflower, carrots)
- Quinoa Salad
- Steamed Green Beans
- Zucchini Noodles
- Greek Yogurt-based Coleslaw
Serving Ideas:
- Chicken Tender Wrap: Wrap tenders with lettuce, tomato, and sauce in a tortilla.
- Tender Salad: Top a mixed green salad with sliced chicken tenders.
- Tender Parmesan: Top tenders with marinara sauce and mozzarella, then broil.
- Tender Tacos: Slice tenders and serve in taco shells with toppings.
- Tender Stir-Fry: Cut cooked tenders into bite-sized pieces and add to a vegetable stir-fry.
11. Nutritional Information and Dietary Considerations
While delicious, it’s important to be aware of the nutritional content of chicken tenders. Here’s a general breakdown for a typical serving of 3-4 breaded and fried chicken tenders:
- Calories: 300-400
- Protein: 20-25g
- Carbohydrates: 15-20g
- Fat: 15-20g
- Fiber: 1-2g
- Sodium: 600-800mg
Note that these values can vary significantly based on preparation method and serving size.
Dietary Modifications:
- Gluten-Free: Use gluten-free breadcrumbs or crushed gluten-free cereal for breading.
- Low-Carb: Use crushed pork rinds or almond flour instead of breadcrumbs.
- Keto: Use a mixture of Parmesan cheese and crushed pork rinds for breading.
- Dairy-Free: Omit cheese in recipes and use plant-based milk for egg wash.
Always check specific recipes and ingredients for accurate nutritional information and allergen content.
12. Troubleshooting Common Chicken Tender Issues
Even experienced cooks can encounter issues when making chicken tenders. Here are some common problems and solutions:
- Breading Falls Off:
- Solution: Ensure chicken is dry before breading. Press breading firmly onto chicken. Let breaded tenders rest in refrigerator for 30 minutes before cooking.
- Tenders Are Dry:
- Solution: Don’t overcook. Use a meat thermometer to check for doneness (165°F or 74°C internal temperature).
- Greasy Tenders:
- Solution: Ensure oil is hot enough (350-375°F or 175-190°C). Don’t overcrowd the pan when frying.
- Uneven Cooking:
- Solution: Cut tenders to uniform size. Ensure even oil temperature when frying.
- Bland Flavor:
- Solution: Season each component (chicken, flour, breadcrumbs). Consider marinating chicken before breading.
- Soggy Baked Tenders:
- Solution: Use a wire rack when baking to allow air circulation. Spray with oil before baking for crispiness.
13. Frequently Asked Questions
- Q: Can I use chicken breast instead of tenderloins?
A: Yes, simply cut chicken breast into 1-inch wide strips. - Q: How do I know when chicken tenders are fully cooked?
A: Use a meat thermometer to ensure the internal temperature reaches 165°F (74°C). - Q: Can I make these ahead of time?
A: Yes, you can bread tenders in advance and refrigerate or freeze before cooking. - Q: What’s the best oil for frying chicken tenders?
A: Vegetable oil, canola oil, or peanut oil are good choices due to their high smoke points. - Q: How can I make my chicken tenders extra crispy?
A: Double-bread them (flour-egg-breadcrumbs-egg-breadcrumbs) or use crushed cornflakes in the breading.
14. Conclusion: Mastering the Art of Chicken Tenders
Chicken tenders, with their crispy exterior and juicy interior, have earned their place as a beloved comfort food. Whether you prefer them classic and deep-fried or are exploring healthier baked or grilled options, there’s a chicken tender recipe to suit every taste and dietary need.
By understanding the history, perfecting your breading technique, exploring various cooking methods, and experimenting with flavors and dipping sauces, you can elevate this simple dish to new culinary heights. Remember, the key to great chicken tenders lies in quality ingredients, proper preparation, and cooking with care.
Whether you’re cooking for a family dinner, meal prepping for the week ahead, or satisfying a crispy chicken craving, this guide provides you with all the tools you need to create delicious chicken tenders at home. So, roll up your sleeves, get your breading station ready, and prepare to enjoy the crispy, juicy goodness of homemade chicken tenders!


