How to Make Buttermilk: A Comprehensive Guide to Homemade Buttermilk

Buttermilk has long been a staple in kitchens around the world, celebrated for its unique tangy flavor and versatile applications in both sweet and savory dishes. Whether you’re baking fluffy pancakes, crafting tender biscuits, or marinating succulent chicken, buttermilk plays a crucial role in enhancing flavors and textures. While store-bought buttermilk is readily available, making your own homemade buttermilk is simple, economical, and ensures freshness. This comprehensive guide will walk you through everything you need to know about making buttermilk at home, including its history, benefits, methods of preparation, storage tips, and creative uses.
Table of Contents
- What is Buttermilk?
- The History of Buttermilk
- Why Make Your Own Buttermilk?
- Essential Ingredients and Tools
- Methods to Make Buttermilk at Home
- Step-by-Step Guide to Making Buttermilk
- Tips for Perfect Homemade Buttermilk
- Storing and Shelf Life
- Creative Uses for Homemade Buttermilk
- Frequently Asked Questions (FAQs)
- Conclusion
What is Buttermilk?
Buttermilk is a fermented dairy product with a slightly tangy flavor and a creamy texture. Traditionally, buttermilk referred to the liquid left behind after churning butter from cultured cream. This traditional buttermilk is known for its rich flavor and thickness. However, modern buttermilk is typically cultured, meaning it is made by adding specific bacterial cultures to pasteurized milk, which ferment the lactose and produce lactic acid, giving buttermilk its characteristic tang.
Key Characteristics of Buttermilk:
- Tangy Flavor: The lactic acid imparted by bacterial cultures gives buttermilk its distinctive sour taste.
- Creamy Texture: Buttermilk has a thicker consistency than regular milk, making it ideal for adding moisture and richness to recipes.
- Low Fat Content: Traditional buttermilk is lower in fat compared to the cream used to make butter, making it a healthier alternative in many dishes.
The History of Buttermilk
Buttermilk has a storied history that dates back thousands of years. In ancient civilizations, it was a common byproduct of butter-making processes. When cream was churned, the leftover liquid was known as buttermilk, prized for its refreshing taste and nutritional benefits. Over time, as dairy farming and food preservation techniques evolved, cultured buttermilk became more prevalent, ensuring a consistent and safe product.
Buttermilk in Culinary Traditions:
- American Cuisine: Essential in Southern dishes like fried chicken and pancakes.
- Indian Cuisine: Used in beverages like lassi and in marinades.
- European Cuisine: Integral in baking pastries and breads.
The transition from traditional to cultured buttermilk broadened its availability and applications, making it a versatile ingredient in modern kitchens worldwide.
Why Make Your Own Buttermilk?
While store-bought buttermilk is convenient, there are several compelling reasons to consider making your own:
- Cost-Effective: Homemade buttermilk is cheaper, especially if you frequently use it in recipes.
- Freshness: Ensures you have fresh buttermilk without preservatives or additives.
- Convenience: Useful when you run out of buttermilk and need a quick substitute for baking or cooking.
- Control Over Ingredients: Allows you to avoid additives and choose the type of acidifier you prefer (vinegar, lemon juice, etc.).
- Customization: Adjust the thickness and tanginess according to your preference.
Making your own buttermilk is quick, requiring only a few simple ingredients that you likely already have in your pantry.
Essential Ingredients and Tools
Before diving into the methods of making buttermilk, it’s essential to gather the necessary ingredients and tools.
Ingredients
- Milk: Whole milk is preferred for its richness, but you can use 2% or skim milk depending on your dietary preferences.
- Acidifier: Common choices include white vinegar, lemon juice, or cream of tartar.
- Optional: Yogurt or sour cream can be used as a base for a thicker consistency.
Tools
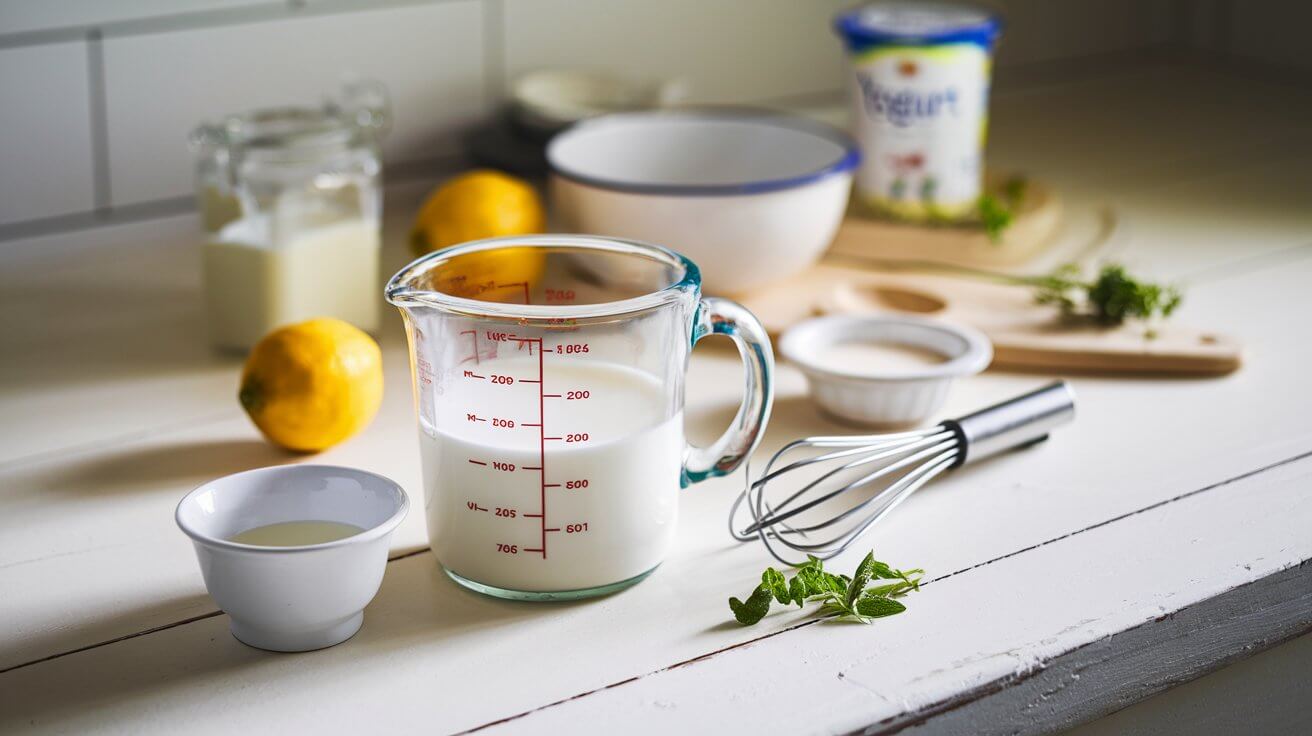
- Measuring Cups and Spoons: Accurate measurements are crucial for consistency.
- Mixing Bowl: A medium-sized bowl to combine ingredients.
- Whisk or Spoon: For stirring the mixture thoroughly.
- Container with Lid: To store the homemade buttermilk in the refrigerator.
Methods to Make Buttermilk at Home
There are multiple methods to make buttermilk at home, each utilizing different acidifiers or bases. Below, we explore four popular methods:
1. Using Milk and Vinegar
Ingredients:
- 1 cup milk (whole, 2%, or skim)
- 1 tablespoon white vinegar
Instructions:
- Measure the Milk: Pour 1 cup of milk into a measuring cup or bowl.
- Add Vinegar: Stir in 1 tablespoon of white vinegar.
- Let It Sit: Allow the mixture to sit for about 5-10 minutes. The milk will thicken slightly and may curdle.
- Use or Store: Your homemade buttermilk is now ready to use in recipes or can be stored in the refrigerator for up to 48 hours.
2. Using Milk and Lemon Juice
Ingredients:
- 1 cup milk
- 1 tablespoon lemon juice
Instructions:
- Combine Milk and Lemon Juice: In a measuring cup, add 1 tablespoon of fresh lemon juice to 1 cup of milk.
- Mix and Wait: Stir well and let the mixture sit for 5-10 minutes. The milk will curdle as it reacts with the lemon juice.
- Ready to Use: After the waiting period, your buttermilk substitute is ready for incorporation into your favorite recipes.
3. Using Milk and Cream of Tartar
Ingredients:
- 1 cup milk
- 1 ¾ teaspoons cream of tartar
Instructions:
- Measure Milk: Pour 1 cup of milk into a bowl.
- Add Cream of Tartar: Whisk in 1 ¾ teaspoons of cream of tartar until fully dissolved.
- Rest: Let the mixture sit for about 5 minutes to thicken.
- Utilize in Recipes: Your homemade buttermilk is now ready to enhance your culinary creations.
4. Using Yogurt or Sour Cream
Ingredients:
- ¾ cup plain yogurt or sour cream
- ¼ cup milk
Instructions:
- Combine Yogurt or Sour Cream with Milk: In a bowl, mix ¾ cup of plain yogurt or sour cream with ¼ cup of milk to achieve a buttermilk-like consistency.
- Mix Thoroughly: Whisk until smooth and well combined.
- Use as Buttermilk: This mixture serves as an excellent substitute for buttermilk in various recipes.
Step-by-Step Guide to Making Buttermilk
Creating homemade buttermilk is straightforward. Here’s a detailed, step-by-step guide using the milk and vinegar method, which is one of the most popular approaches:
Ingredients
- 1 cup milk (recommended: whole milk for richness)
- 1 tablespoon white vinegar (or lemon juice)
Tools
- Measuring cup
- Tablespoon
- Mixing bowl or container
- Whisk or spoon
Instructions
- Measure the Milk:
- Pour 1 cup of milk into a measuring cup or mixing bowl. Ensure you’re using the correct measurement for consistency in recipes.
- Add the Vinegar:
- Add 1 tablespoon of white vinegar to the milk. If you prefer using lemon juice, substitute it for the vinegar in the same quantity.
- Stir the Mixture:
- Gently stir the vinegar and milk together using a whisk or spoon. This helps in evenly distributing the acid throughout the milk.
- Let It Sit:
- Allow the mixture to stand at room temperature for 5-10 minutes. During this time, the acid reacts with the milk, causing it to curdle slightly and thicken into buttermilk.
- Check the Consistency:
- After the waiting period, the milk should have a thicker consistency with minor lumps indicating proper curdling.
- Use or Store:
- Your homemade buttermilk is now ready to use in baking, cooking, or marinating. If not using immediately, cover the container with a lid or plastic wrap and store it in the refrigerator. It remains fresh for up to 48 hours.
Tips for Perfect Homemade Buttermilk
Achieving the perfect buttermilk consistency and flavor is essential for the best culinary results. Here are some expert tips to ensure your homemade buttermilk meets your expectations:
1. Choose the Right Milk
- Whole Milk: For a richer, creamier buttermilk, use whole milk. It adds more body and flavor to your recipes.
- Low-Fat or Skim Milk: These options are suitable for lighter dishes but may result in a thinner consistency.
2. Accurate Measurements
- Precision Matters: Ensure you’re using the correct ratio of milk to acidifier. Too much acid can make the buttermilk overly sour, while too little might not provide the desired tanginess.
- Use Measuring Tools: Utilize measuring cups and spoons for accuracy.
3. Quality of Acidifier
- Fresh Vinegar and Lemon Juice: Use fresh, high-quality white vinegar or fresh lemon juice for the best flavor.
- Avoid Strong Flavors: Avoid using flavored or aged vinegars, as they can alter the taste of your buttermilk.
4. Timing is Key
- Don’t Rush the Process: Allow the milk and acid mixture ample time (5-10 minutes) to curdle and thicken properly.
- Temperature Considerations: Room temperature helps in the reaction between the milk and acid. Ensure the milk isn’t too cold, which can slow the process.
5. Stir Gently
- Avoid Overstirring: Stir the mixture gently to distribute the acid without overmixing, which can lead to an overly curdled texture.
- Minor Lumps are Normal: A few small lumps are acceptable and won’t affect the quality of your buttermilk.
6. Storage Tips
- Use Airtight Containers: Store your buttermilk in airtight containers to prevent it from absorbing other odors in the refrigerator.
- Label and Date: Mark your containers with the date to keep track of freshness.
7. Adjusting Consistency
- Too Thick: If the buttermilk is too thick, add a small amount of milk to achieve the desired consistency.
- Too Thin: If it’s too thin, add a bit more yogurt or sour cream if using that method, or reduce the milk slightly in other methods.
Storing and Shelf Life
Proper storage of homemade buttermilk ensures it remains fresh and safe for consumption. Here’s how to store your buttermilk effectively:
Refrigeration
- Temperature: Store buttermilk in the refrigerator at or below 40°F (4°C).
- Containers: Use airtight containers to prevent contamination and odor absorption.
- Shelf Life: Homemade buttermilk typically lasts 2-3 days in the refrigerator. Always check for signs of spoilage before use.
Freezing
- Freezing Method: Pour buttermilk into freezer-safe containers or ice cube trays. Once frozen, transfer the cubes to a freezer bag.
- Shelf Life: Can be stored in the freezer for up to 3 months.
- Thawing: Thaw frozen buttermilk in the refrigerator overnight. Shake or stir well before using, as some separation may occur.
Signs of Spoilage
- Sour Smell: While buttermilk is naturally tangy, an excessively sour or off smell indicates spoilage.
- Mold: Visible mold growth means the buttermilk should be discarded.
- Unpleasant Taste: If the taste is unusually sharp or unpleasant, it’s best to err on the side of caution and discard it.
Creative Uses for Homemade Buttermilk
Homemade buttermilk is a versatile ingredient that can elevate a wide range of dishes. Here are some creative ways to incorporate it into your culinary repertoire:
Baking Fluffy Pancakes and Biscuits
Buttermilk is synonymous with fluffy, tender baked goods. Its acidity reacts with baking soda or baking powder in recipes, producing carbon dioxide bubbles that create a light and airy texture.
Buttermilk Pancakes:
- Recipe Highlight: Incorporate buttermilk into your pancake batter for extra fluffiness and a subtle tang.
- Topping Suggestions: Serve with fresh berries, maple syrup, or whipped cream.
Buttermilk Biscuits:
- Recipe Highlight: Use buttermilk in biscuit recipes for thinner, flakier layers.
- Serving Suggestions: Pair with butter, honey, or use as a sandwich base for sausages or fried chicken.
Marinating Meats
The acidity in buttermilk makes it an excellent marinade for tenderizing meats, particularly chicken.
Buttermilk Chicken:
- Preparation: Marinate chicken pieces in buttermilk for several hours or overnight.
- Benefits: The acidity breaks down proteins, resulting in juicy, tender, and flavorful chicken when cooked.
Making Dressings and Marinades
Buttermilk serves as a creamy base for a variety of dressings and marinades, adding richness and a tangy twist.
Buttermilk Ranch Dressing:
- Ingredients: Combine buttermilk with mayonnaise, sour cream, fresh herbs, garlic, and seasoning.
- Usage: Perfect for salads, dipping vegetables, or as a topping for baked potatoes.
Buttermilk Marinade for Vegetables:
- Preparation: Marinate vegetables like eggplant or zucchini in a buttermilk mixture before grilling or roasting.
- Benefits: Enhances flavor and imparts a creamy texture.
Crafting Smoothie Bases
Buttermilk can be used as a nutritious base for smoothies, adding creaminess and a slight tang without overpowering other flavors.
Buttermilk Berry Smoothie:
- Ingredients: Blend buttermilk with mixed berries, a banana, honey, and a handful of spinach for a healthy breakfast option.
- Nutrition: Packed with protein, probiotics, and essential vitamins.
Frequently Asked Questions (FAQs)
1. Can I use other types of milk to make buttermilk?
Yes, you can use any type of milk, including whole, 2%, or skim milk. The fat content will affect the richness of the buttermilk, with whole milk providing a creamier texture.
2. How long does homemade buttermilk last?
Homemade buttermilk can be stored in the refrigerator for up to 2-3 days. For longer storage, consider freezing it, where it can last up to 3 months.
3. Can I make buttermilk without vinegar or lemon juice?
Yes, you can use yogurt or sour cream combined with milk as a base for buttermilk substitutes, especially if you’re looking for a thicker consistency.
4. Is homemade buttermilk safer than store-bought?
Homemade buttermilk is fresh and free from preservatives, but it’s essential to store it properly to prevent spoilage. Both homemade and store-bought buttermilk are safe when handled correctly.
5. Can I use homemade buttermilk in coffee?
While it’s possible, buttermilk has a tangy flavor that might not complement the taste of coffee. However, it can be used in coffee-flavored baked goods or lattes as a creamy additive.
6. What can I do if my buttermilk doesn’t curdle?
If the milk doesn’t curdle after the waiting period, it might be due to using too cold of milk or not enough acidifier. Try adding a little more vinegar or lemon juice and let it sit for a few more minutes.
7. Can I reuse the leftover solids from buttermilk?
The minor curds formed during the buttermilk-making process are safe to consume and can be used in baking or cooking, adding extra protein to your dishes.
8. Is buttermilk vegan?
Traditional buttermilk is dairy-based and not vegan. However, you can create vegan buttermilk substitutes using plant-based milks like almond, soy, or oat milk combined with vinegar or lemon juice.
Conclusion
Making your own buttermilk is a simple yet impactful way to enhance your cooking and baking endeavors. With just a few ingredients—milk and an acidifier—you can produce fresh, tangy buttermilk tailored to your desired consistency and flavor. Whether you’re striving for the perfect fluffy pancakes, marinating tender chicken, or crafting creamy dressings, homemade buttermilk serves as a versatile and indispensable ingredient in the kitchen.
Understanding the various methods to create buttermilk at home empowers you to make adjustments based on what you have on hand and your specific dietary needs. From using vinegars and lemon juice to incorporating yogurt or sour cream, each method offers a slightly different take on this classic dairy product.
Additionally, recognizing the many uses of buttermilk beyond baking opens up a world of culinary possibilities, allowing you to experiment and innovate in your kitchen. The benefits of making buttermilk at home—cost savings, freshness, and customization—make it a worthwhile addition to your cooking routine.
Embrace the simplicity and versatility of homemade buttermilk, and elevate your culinary creations with this tangy, creamy, and indispensable ingredient. Happy cooking!
By following this guide, you now have the knowledge and confidence to make buttermilk at home effortlessly. Enjoy the delightful tang and creamy texture it brings to your favorite recipes!


